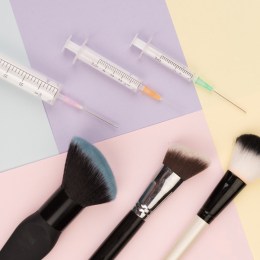
Liane Scior, creator of all-Australian ELES Mineral Makeup, shares her top tips for transforming your clients’ look.
Y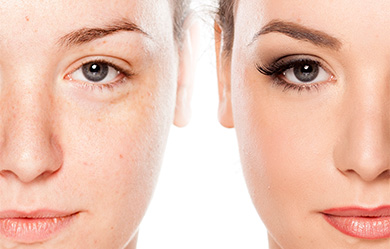 OUNGER, BETTER, BRIGHTER
For a more youthful, sculpted face: Rule of thumb is that dark makes areas recede and light brings features forward. When choosing products to contour the face, opt for bronzers with very little ‘orange’ – redder bronzers will look more natural. Apply lightly, as a little goes a long way, and use a big, soft fluffy brush for best results. Always use matte products to contour. Apply contour just beneath the cheekbones towards the ear, along the hair line of the forehead, beneath the jawline and down the sides of the neck. By receding the outer perimeters of the face you are bringing the centre of the face forward.
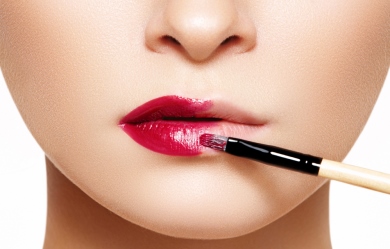
Fuller-looking lips: Forget the fillers! Apply a little highlighter to the cupids bow to enhance it, use lighter shades of lipstick for a fuller lip. If cheating the lipline by drawing outside the line, use matte lipstick and lipliner as frost will emphasise the true border.
Fuller-looking cheeks: Use a light concealer beneath the eyes and down the centre of the cheek in an upside down triangle and blend the edges. This makes the area not only look fuller but more youthful.
Making skin appear more youthfully radiant: Again, it’s all in the preparation. There is a very fine line between over-preparing the skin and causing the product to slip off, and under-preparing the skin thus causing makeup to absorb into the skin. The area should be well hydrated without being greasy, so a good eye cream and a hydrating concentrate are recommended. Allow time for the product to absorb and settle; up to 15 minutes before makeup will give a better result (this, of course, depends how much time you can devote to doing a client’s makeup, but it’s a good tip for them to follow at home). Primers are optional – and a whole other subject as there are many varieties of primers available! The overall key is not to apply too much product, keep every layer fine and light and you’ll create a more natural and lasting result.
Bigger, brighter eyes: Enhance the contour of the eye with a matte bronzer just above the natural crease. Avoid very dark eyeliner – instead, opt for softer more muted lining of the eyes and apply lots of mascara. To ‘lift’ the eyes, highlight just beneath the brows, and on the upper cheekbones to bring them forward.
Reduce the appearance of under eye pouches: Apply a peachy-toned corrector. Then, using a fine eyeliner brush, apply a lighter shade of concealer just below the pouch in the depression line in a fine line, press into the skin to blend.
Detract attention from upper eye puffiness: Use mid-tone matte shadow to help the area recede. Avoid light colours as thet tend to emphasise the problem.
Make a prominent nose look more refined: Use a sculpting bronzer very lightly down the sides of the nose and a highlighter down the centre of the nose.
Even out skin tone for a flawless look: It’s all in the preparation and CC creams are a godsend to makeup artists. They correct the colour, so less base is required. If you don’t have a CC cream at hand, however, remember you don’t need to use foundation all over the face. Just apply a very light layer on the areas of redness and discolouration and spend more time concealing expertly. The result will look lighter, more natural and will last a lot longer. If your client’s makeup appears ‘cakey’, a light spritz with a hydrating spray will soften it and give a more natural appearance.
CAMOUFLAGE GEAR
Brightening dark circles. The best way is with an under eye corrector; fine-textured concealers that have a strong ‘peachy’ tone to counteract the blueish tinge of the shadows. By using a good corrector and a lightweight concealer over the top you’ll have the cover you need without a thick mask that falls into fine lines and looks cakey.
Covering bruises (for instance, after non-surgical treatments such as fillers and anti-wrinkle injections). Again, peachy-toned correctors work best on bruises to counteract the purple/blue. Using a light shade of concealer on these areas will only make them look greyish.
Diminishing the appearance of redness and/or broken capillaries. Green correctors used to be the best solution for concealing redness, however they can make the skin look flat and lifeless. CC (colour correction) creams with photo-optic filters will help reflect back light on the skin, greatly reducing the appearance of redness and the dark red of broken capillaries.
Concealing pimples, acne and rosacea. Oil-free and non-comedogenic cover-ups are best and many now have skin-enhancing benefits such as tea tree to soothe inflammation and blitz bacteria. Avoid mineral oil, lanolin and talc-based products, which tend to block the pores and exacerbate breakouts. Mineral makeup and foundations with soothing ingredients or water-based CC creams help reduce the overall erythema (redness), with spot-concealing to cover the blemishes are the best strategies.